Copy command line output to the clipboard on macOS, Windows, and Linux

NOTE: Updated for PowerShell 7, with Set-Clipboard available to supported platforms (Linux still requires xclip).

You’ve just figured out the exact piece of information you need from a command line call. Now, how do you get it out of your terminal and take it somewhere else, like an email, chat, or document?

Fortunately, there are already programs out there to make this easy. You can send the output from any command to one of these applications, and the output will be available in your clipboard. From there, you can paste it anywhere you please. In the case of Windows and macOS, there are programs to do this that come with the OS. On Linux, you can install a tool to have the same functionality.

Windows

Whether you are in Command Prompt or PowerShell (old-school or Core), you can use the Windows clip application to get output to the clipboard. Should it matter to you, clip will append an extra line break to whatever you feed it.

command {some command} | clip

For example, to dump your file listing to the clipboard, you would run dir | clip or Get-ChildItem . | clip, with dir working in both cmd and all flavors of PowerShell and the later only working in PowerShell.

PowerShell 7 or the older non-Core PowerShell also offers its own command: Set-Clipboard that won’t append the line break. You can also pass it the -Append parameter to keep building a result in the clipboard.

powershell {some command} | Set-Clipboard

The Set-Clipboard command isn’t available on PowerShell Core versions before 7. For those PowerShell Core version, you’ll have to pass your output to the OS-specific version like clip or pbcopy, which is the magic program to use on macOS.

macOS

Whether you are in Terminal or PowerShell Core, you can use the macOS pbcopy application to get output to the clipboard. Should it matter to you, pbcopy will append an extra line break to whatever you feed it.

bash {some command} | pbcopy

So, for example, if you want to dump the current directory’s file listing to the clipboard, you would run ls | pbcopy or Get-ChildItem . | pbcopy.

PowerShell 7 also offers its own command: Set-Clipboard. You can also pass it the -Append parameter to keep building a result in the clipboard.

powershell {some command} | Set-Clipboard

Linux (probably not all variants)

To do the same magic on Linux, you need to install a program to do the work for you. One option is xclip. You can install it with apt-get.

bash sudo apt-get install xclip

From there, you can start passing things to the clipboard using xclip as your destination.

bash {some command} | xclip

PowerShell 7 also offers its own command: Set-Clipboard. You can also pass it the -Append parameter to keep building a result in the clipboard.

powershell {some command} | Set-Clipboard

Determine SHA hash of file on Windows, Linux, and macOS

While it doesn’t guarantee a download hasn’t been compromised, sometimes you feel better knowing the file you downloaded matches the expected SHA hash.

Full disclosure here: while I haven’t been paid or provided anything for this blog post, I am only creating this post for me. If it helps you, great! I just keep looking this up every time I need it. Instead of wading through a bunch of Stack Overflow answers to find the exact magic command I need, I’m hoping I’ll start finding my own blog post in my search results.

SHA-256 hash commands

Here’s what I use most days. There are bound to be other ways to do this, and on more operating systems or command line shells. As well, there may be ways that are better suited for certain tasks like scripting or other automation steps. For the occasional one-off hash needs, though, they get the job done.

macOS

shasum --algorithm 256 ~/Downloads/some-file.zip

Windows (cmd.exe)

CertUtil -hashfile ~/Downloads/some-file.zip SHA256

Windows (PowerShell)

Confirmed in v6.1.3 [Core], but it probably works in several earlier versions.

Get-FileHash -Path ~/Downloads/some-file.zip -Algorithm SHA256

Linux

I’ve only confirmed this on a few flavors of Ubuntu and Debian/Raspbian.

sha256sum ~/Downloads/some-file.zip

Background

If you want to learn a little more about the use of hashing files, feel free to read on for some context. Otherwise, I hope these commands find us all when you need them.

Why would I need a file hash?

As I mentioned, I usually do this to confirm a file I downloaded matches what the site said it should be when I clicked the download link. In an ideal world, this means I have downloaded the expected file exactly, and I didn’t end up downloading some compromised file or malware instead.

For example, if some software is made available from a download site to reduce their own bandwidth costs, they might build new releases to a ZIP file and upload them there for users to download. If someone were to compromise that download site and upload a malicious version of the software, unsuspecting users might click a download link and get the compromised download. If, instead, the software developers determined a cryptographic hash of the file and posted it to their own site, I could verify the same cryptographic hash of the file I downloaded from the external download site. If the hashes match, I can be reasonably sure the hash the developer generated was from the same file I downloaded.

In the real world, if someone has compromised a project, they might have compromised the project’s website as well. In that case, they could create a malicious download, determine the hash of the compromised file, and post that to the project site so that it matches the compromised file on the download site.

There is also potential for a hash to match but with different files, referred to as a hash collision. If someone could create a compromised download that had the same hash, all bets are off. The better the hashing algorithm, the less likely this can happen, but it’s something that could theoretically happen. This potential risk is why I am using SHA-256 instead of something like MD5 hashes in the above commands, because collisions are less likely in the more advanced hashing algorithm.

When should I worry?

I don’t have a good answer here. Open source projects have been compromised in ways that would have never shown up in a file hash. If a project’s source code or release pipeline is compromised, you are likely getting the hash they tell you to expect, but the files within that download are not trustworthy. There’s not a lot you could do at this point, and you may not even know there is an issue.

Most of the time, I only concern myself with this when I trust a project but I don’t trust the provider where the project hosts their downloads. For instance, I would trust a download from a project on GitHub more than a project that linked out to SourceForge or similar

I might also find a project where it’s hard to tell whether I’m downloading the latest release. If they provide hashes of the various versions, I can verify I have the one I wanted.

Similarly, when I’m working with legacy projects where downloads are now scattered across various download services, I may read from someone who trusts a particular download and they list the hash they found. I would possibly have more faith in a download I found with the same hash as well.

A healthy dose of paranoia is good, but it only goes so far in this realm. Stay safe out there!

Workaround: Xamarin.Android long paths on Windows

Quick answer (TL;DR)

Create a symbolic link from your deeply-nested folder to a shorter path using one of the following commands in an Administrator prompt.

Command Prompt

mklink /D {desired-path-location} {actual-path-location}

PowerShell [Core]

New-Item -ItemType SymbolicLink -Path {desired-path-location} -Value {actual-path-location}

After you create the symbolic link, drag the desired solution into Visual Studio rather than navigating through the link in the Open dialog, which will override to the original path.

Background

If you like to keep all your code in a user directory on Windows, there’s a very good chance you’ve cloned a repo or started a new Xamarin.Android project that ran into issues on the first build. Most likely you have run into a path length issue. Sometimes a project is just so nested, even putting the repo in a low-level folder will still have trouble.

If you read the error messages, sometimes they explicitly say there is a path length issue. Sometimes, though, it will be something unusual like this JavaTypeInfo error. I don’t know enough of the Android build process to explain the issue here, but it’s definitely looking for a file at a path location that is 269 characters long.

Failed to create JavaTypeInfo for class: Android.Support.V4.View.Accessibility.AccessibilityManagerCompat/IAccessibilityStateChangeListenerImplementor due to System.IO.DirectoryNotFoundException: Could not find a part of the path ‘C:\Users\patridge\source\repos\mslearn-create-a-mobile-app-with-xamarin-forms\src\exercise1\final\Phoneword\Phoneword.Android\obj\Debug\81\android\src\mono\android\support\v4\view\accessibility\AccessibilityManagerCompat_AccessibilityStateChangeListenerImplementor.java’. at System.IO.__Error.WinIOError(Int32 errorCode, String maybeFullPath) at System.IO.FileStream.Init(String path, FileMode mode, FileAccess access, Int32 rights, Boolean useRights, FileShare share, Int32 bufferSize, FileOptions options, SECURITY_ATTRIBUTES secAttrs, String msgPath, Boolean bFromProxy, Boolean useLongPath, Boolean checkHost) at System.IO.FileStream..ctor(String path, FileMode mode, FileAccess access, FileShare share, Int32 bufferSize) at Xamarin.Android.Tools.Files.CopyIfStreamChanged(Stream stream, String destination) at Xamarin.Android.Tasks.Generator.CreateJavaSources(TaskLoggingHelper log, IEnumerable`1 javaTypes, String outputPath, String applicationJavaClass, Boolean useSharedRuntime, Boolean generateOnCreateOverrides, Boolean hasExportReference)

You can definitely run into this issues in a number of situations. Even the Xamarin modules we recently launched on Microsoft Learn have a path like this: {descriptive-module-name}/src/exercise#/{start|final}/{SolutionName}. That’s enough to to get too long for Windows without being in a deeply-nested folder to start.

On Windows, when you start nesting files really deep, you run into a maximum length of 260 characters (drive letter, like “C:\”, plus 256-characters of path from there). While there are ways of circumventing the path length restriction in newer versions of Windows, I haven’t been willing to try them yet. (I doubt I still use any 32-bit applications, but if I did, they wouldn’t be compatible with the long paths.)

Fake a shorter path

I used to copy entire repos to a shallower folder location like C:\dev, or **C:\d** when I got desperate. But sometimes I would forget which location I was working in and leave uncommitted Git changes in the wrong location. Ideally, I would keep all my code in a single location but not have those issues. If you also run into Android build issues that are caused by path lengths, we can trick Windows and Visual Studio into thinking our path is shorter without moving the files from our desired location.

The magic here comes from symbolic links or junctions in the Windows file system. These two tools are a bit like a shortcut, but it steps in the way of the path resolution as you use files and folders it points to. Regardless of the approach, this is how we can make a file at C:\Users\awesomeuser\source\repos\AndroidProjectOfAwesomeness (for Visual Studio 2019; C:\users\awesomeuser\Documents\Visual Studio 2017\Project\AndroidProjectOfAwesomeness) appear like it’s being used from C:\dev\Awesomeness.

The difference a symbolic link and a junction in Windows is subtle, and really only seems to become an issue when dealing with remote connections. Just know that if you are linking from a local path and to a local path, you can probably use either one without seeing any differences.

Create a symbolic link in Windows

Enter the mklink Windows console command. It’s been around for a while, and there was a similar junction command in Windows versions before Windows 8, but it doesn’t get much attention. Open a command or PowerShell prompt from the Start Menu. (Creating a symbolic link requires running this prompt as an administrator unless you have Developer Mode enabled.) Run a command like the following to link from {desired-path-location} (the shortened path) to a location where the code currently exists in {actual-path-location} (the longer path where the Android project isn’t building).

For the Windows Command Prompt, the command looks like this:

mklink /D {desired-path-location} {actual-path-location}

For PowerShell, the command looks like this:

New-Item -ItemType SymbolicLink -Path {desired-path-location} -Value {actual-path-location}

So, if I cloned the intro Xamarin.Forms module exercises from Microsoft Learn to the default location, but I wanted to make sure my path wasn’t too crazy, I could run a command similar to this, where “someuser” is your Windows username.

mklink /D C:\dev\learn-forms C:\Users\someuser\Documents\source\repos\mslearn-create-a-mobile-app-with-xamarin-forms\src\

Or, if you are using PowerShell, the right parameters to New-Item will create a symbolic link as well.

New-Item -ItemType SymbolicLink -Path C:\dev\learn-forms -Value C:\Users\someuser\Documents\source\repos\mslearn-create-a-mobile-app-with-xamarin-forms\src\

From there, I would have access to all the exercise folders, such as the final exercise at C:\dev\learn-forms\exercise1\final\Phoneword.

Using the symbolic link in Visual Studio

For some reason, Visual Studio won’t just play along with the illusion of symbolic links when you navigate through one in the normal open dialog. It will navigate to the original path location, defeating the whole point of all this.

However, if you find the solution file you want in Explorer first and drag it into Visual Studio, it will play along just fine. At this point, you should be happily building your Android projects without issue!

When you’re done with a symbolic link

If a symbolic link ever outlives its usefulness, just delete it like it’s any other shortcut. The original directory will stay where it is. The flip side is also true, tough. If you delete the source directory, the link won’t know any better.

Bonus tip

This can also be a good way to move location-required files from a drive that is running low on space to an external location. Some notable examples include migrating your iTunes music to a different drive, or moving your installed Steam games to another drive. You create a symbolic link from where iTunes or Steam is looking for those file to where you are planning to store them. The app doesn’t know any different, but your C drive can be much less bloated. If you are running Windows from a must-faster-but-smaller SSD, this can be a life saver.

Play Japanese Famicom games with your US Nintendo Switch Online account

If you’re looking for more retro gaming than the NES games that come free with your Nintendo Switch Online subscription, you might be interested in playing some Japanese Famicom games. Turns out you can do this without any additional cost. I’m not suggesting you load an emulator on your Switch, though that seems like an option these days. It’s not totally straightforward, but it’s not too challenging either. And it definitely won’t leave your Switch in a state where you’re afraid to let it update.

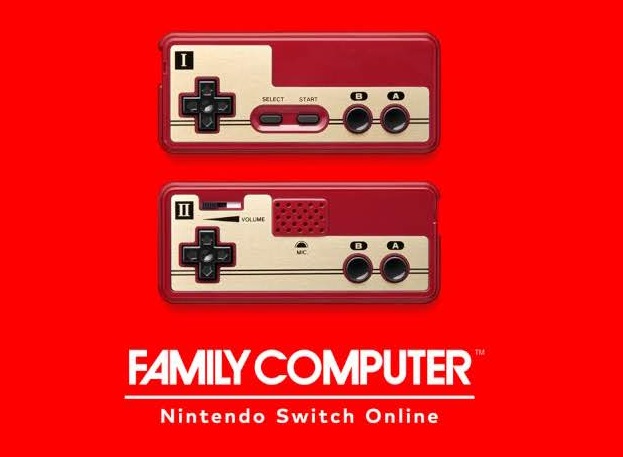
Famicom games app launch screen on a US-based Nintendo Switch

One warning, though. The ads on your Switch home screen now have the ability to show up in either English or Japanese.

Why would you want the Famicom app?

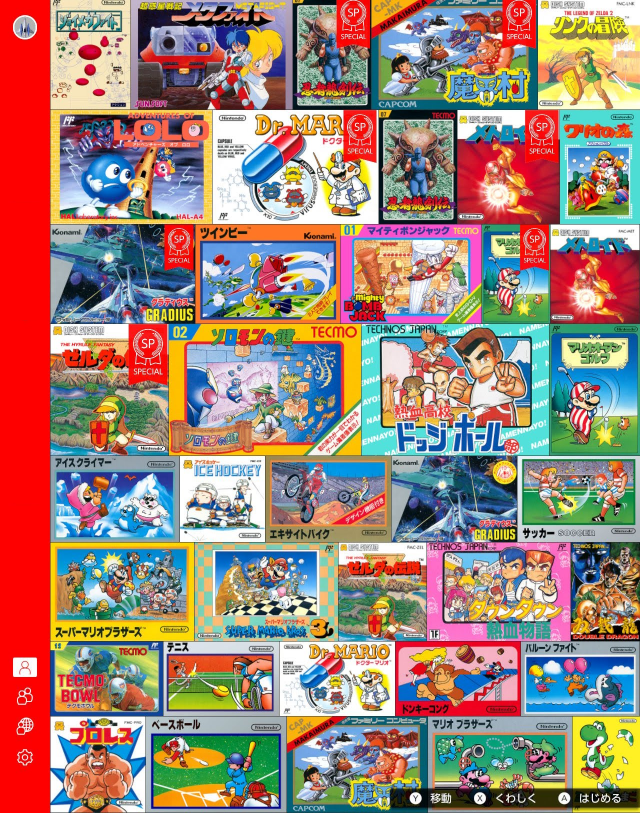
You might just want it because you can. (It’s me!) If you were a Nintendo Switch Online subscriber in Japan, the free retro gaming app is what you would get by default with your subscription is the Famicom app. (And you’d be looking for the reverse instructions to play NES games.) It has all the appropriate cover art images, some of which are just awesome. So, maybe the cover art could sell you on it.

There were also several games that were slightly different when released outside of Japan, whether different difficulty or different parts of games. It also has a few games that aren’t available in the US. Joy Mech Fight is one such game, and supposedly the Mario 3 release in Japan was harder than what hit the US and Europe.

With just a tiny bit of work, you can try out all the Famicom games on your non-Japan Switch.

Get the Famicom app

While there are instructions out there allowing you to get the app downloaded to your Switch entirely from your computer, they require using third-party VPN software that will allow you to bounce your web requests through Japan before they get to Nintendo. I’m not a fan of installing random VPN software, and I’m too lazy to do it in a slightly safer way. (I’m nerdy enough that I would set up a virtual machine with a clean install of Windows just to avoid any potential danger from unknown VPN software installs.)

Fortunately, there’s an alternative. If you use a Nintendo account with its location set to Japan on your Switch, you can download the Famicom Nintendo Switch Online app.

Create and use a Japanese Nintendo Account

  1. Create a Nintendo account with a different email than your account with a Nintendo Switch Online subscription, setting the location set to Japan.

Screenshot of the Nintendo account creation form showing the country field set to Japan

You can set the rest of the account to whatever you want. Most likely, you’ll rarely use this account again. Just make sure you save the new password in LastPass or wherever; you’ll need it in the next part.

  1. Now, on your Switch console, go to the System Settings app (the gear [“sun”] icon on the home screen).
  2. Open up the Users tab on the left and scroll to the bottom of the user list and click Add User.
  3. Set your console user’s icon and nickname to whatever you want.
  4. When prompted, link your new device account to a Nintendo Account using the email and password you used on the Nintendo website. (You saved that password, right?)
  5. Open the Nintendo eShop app from the home screen (the bag [“suitcase”] icon on the home screen).
  6. When asked which user is using the eShop, select your new Japan-based account.

If your Switch is set to English, you’ll be prompted that the Japanese eShop can’t be shown in your system language, but you can just continue. Just know, your going to be using the eShop in Japanese for the next steps.

  1. For this first launch, you’ll also be asked if you want to enter the password for this new account every time you launch the eShop. If you don’t want to enter it every time, check the checkbox above the button right button.
  2. Lastly, click the button to log in with your new Nintendo Account password. (Still need that password!).

Download the app from the eShop

Here’s a video showing the rest of the eShop process, but follow along with the directions if you’d rather work through things at your own pace. The hardest part for someone like me, who can’t read more than a couple katakana characters, was translating the text in the Japanese eShop. Fortunately, the Google Translate app did all the heavy lifting for me there.

  1. On the left-hand side, select the search section on the left (with the magnifying glass).
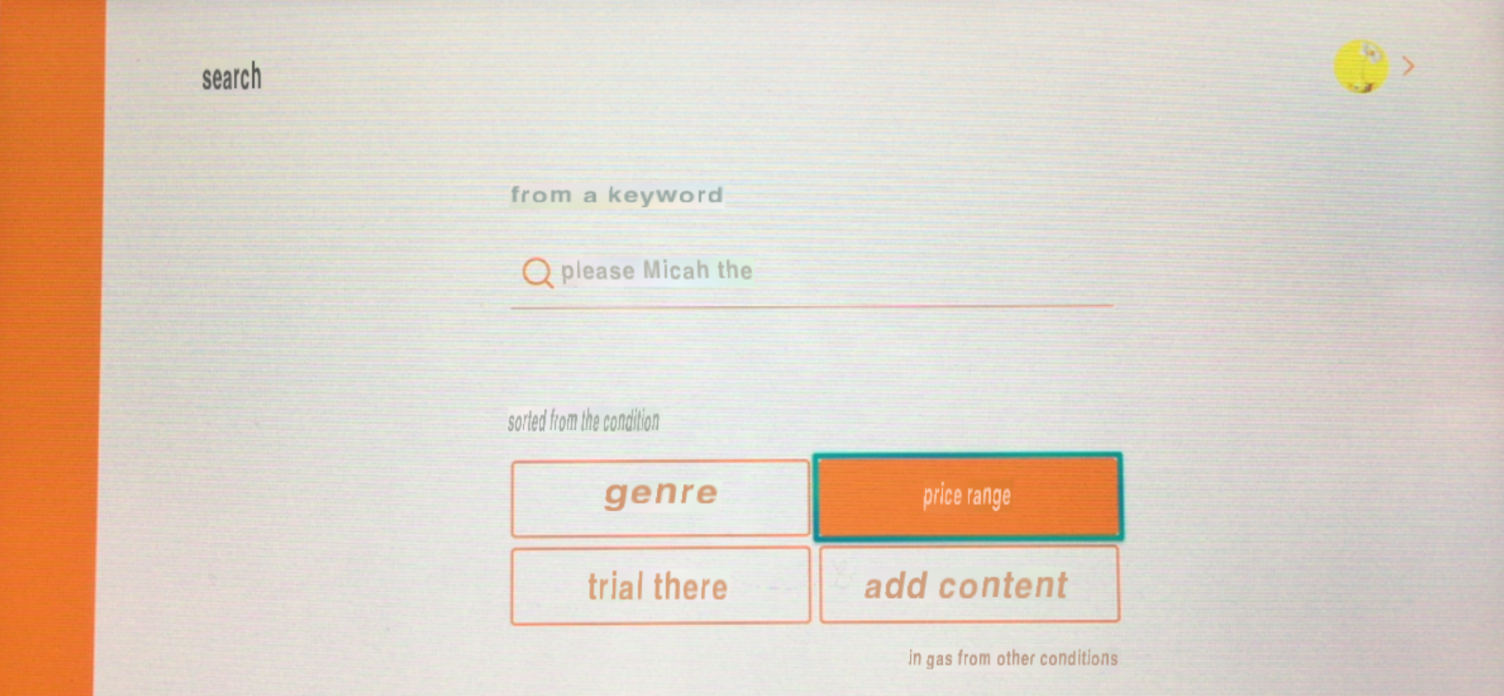
  2. The search page has a typical search field but also has several category/sorting buttons. For this adventure, click the top-right button, which translates roughly to “price range”.

Screenshot showing a Google Translate interpretation of the shop search page with the top-right category button translated as price range.

  1. Within the price range list, scroll all the way down to the bottom section, which has a header that translates roughly to “free download”. Move the cursor over to the little link below the row of apps that translates to “see all” and click that link.

Screenshot showing a Google Translate interpretation of the price range category list with the last category translated as free download and a button below it translated as see all.

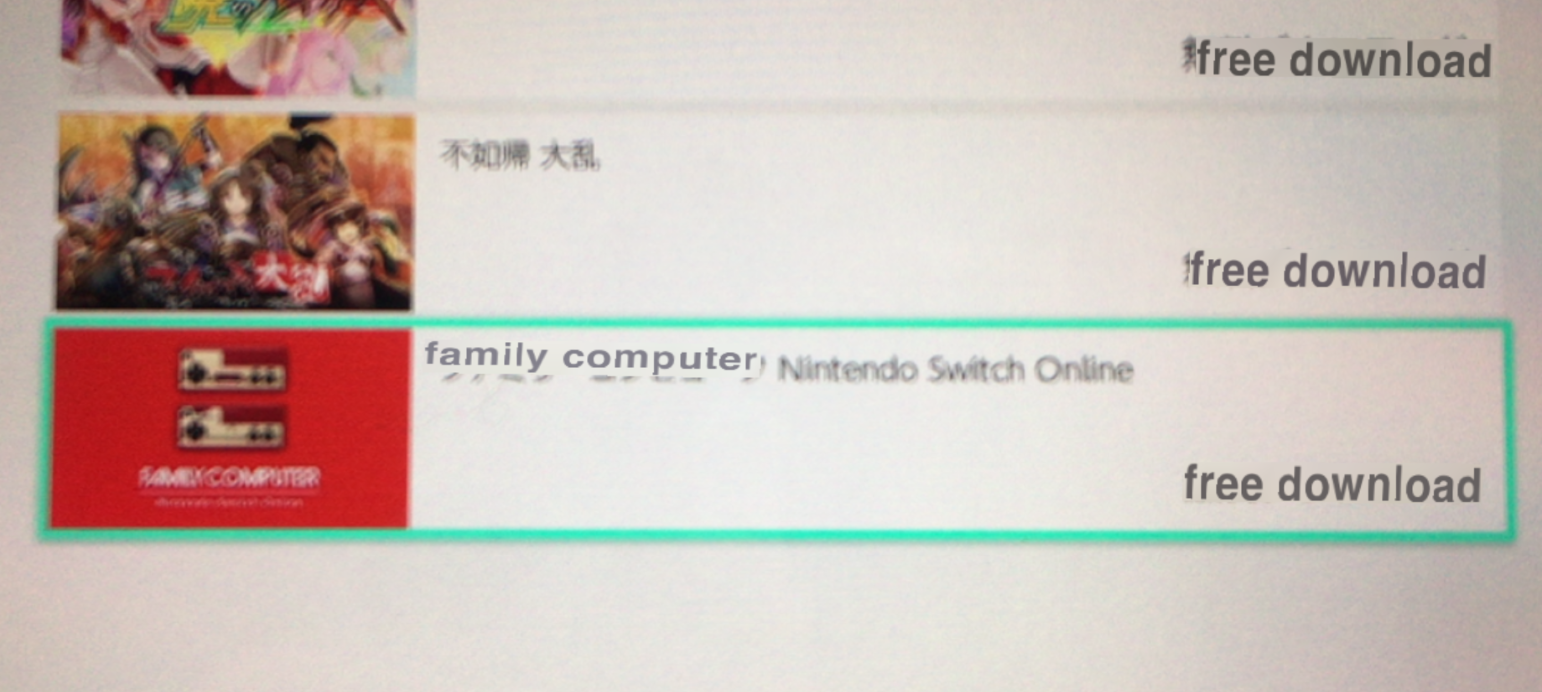
  1. In the right-hand app list, scroll down until you see a red icon with two Famicom controllers on it. (At the time of writing this, it was the very last game in the list.) The title will translate to “Family Computer [Nintendo Switch Online]” and the price should translate to “free download”. Click that app to see its details.

Screenshot showing a Google Translate interpretation of the free download apps with the Famicom game translated as family computer Nintendo Switch Online and a label on the game translated as free download.

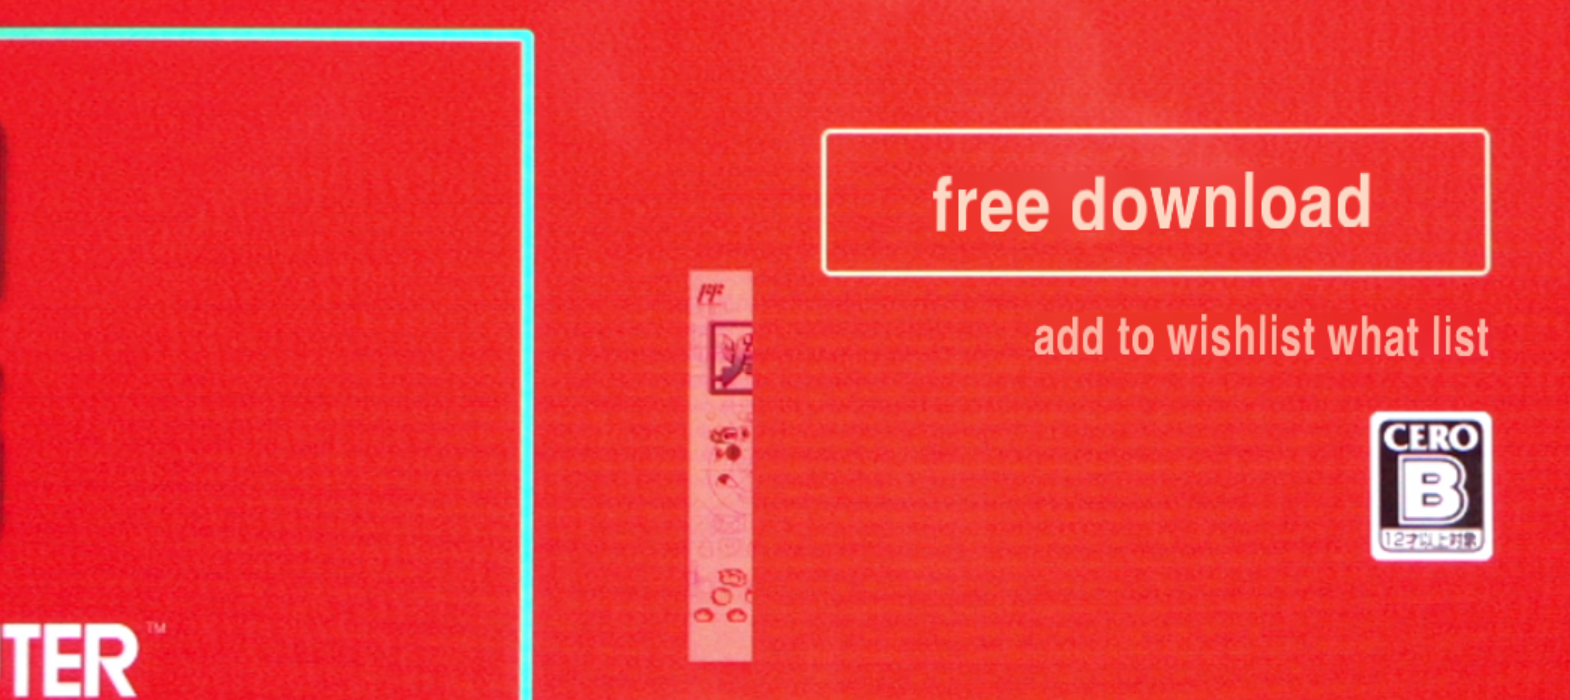
  1. On the Famicom app details, click the right-hand button; it should have a button label that translates to “free download”.

Screenshot showing a Google Translate interpretation of the Famicom app details with the right-hand button translated as free download.

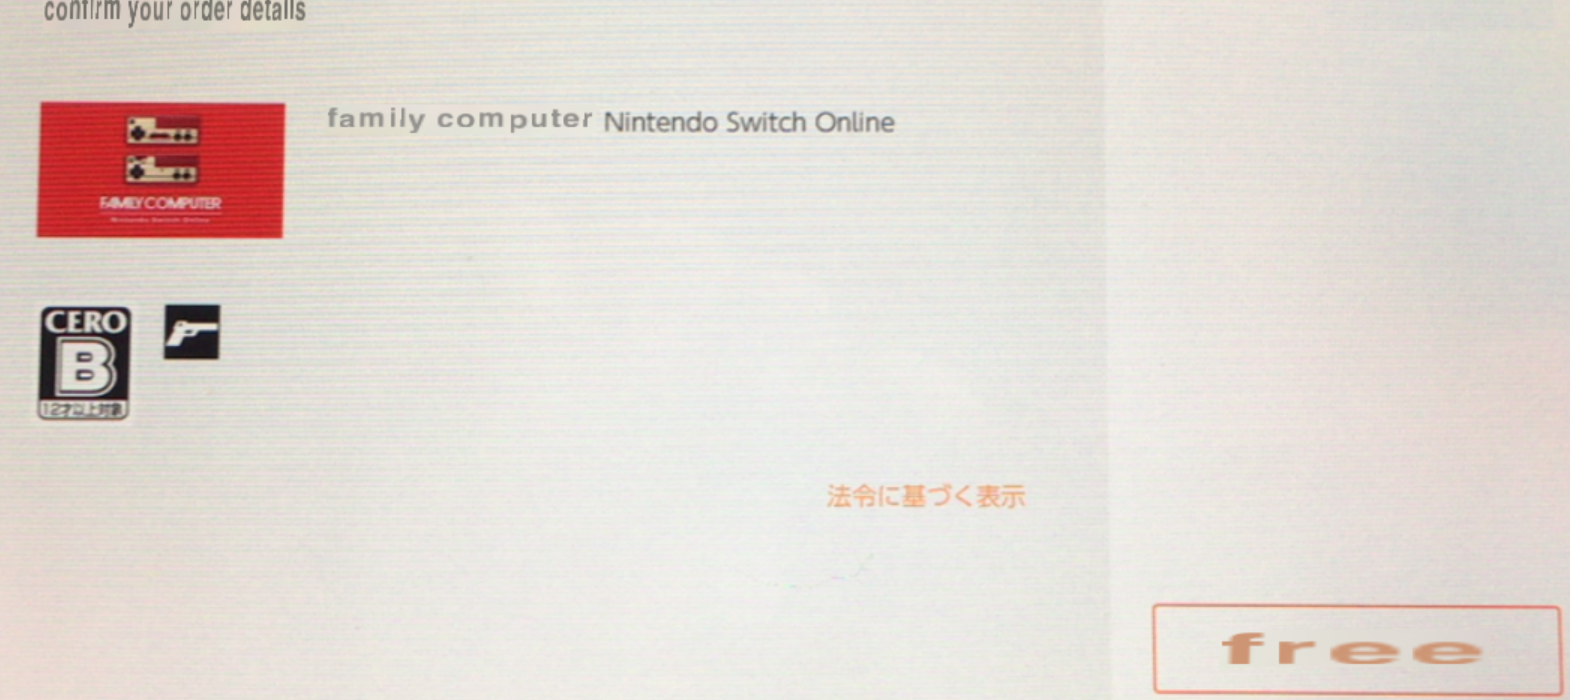
  1. On the checkout order details screen, click the bottom right button that translates to “free”.

Screenshot showing a Google Translate interpretation of the order confirmation screen with the bottom-right button translated as free.

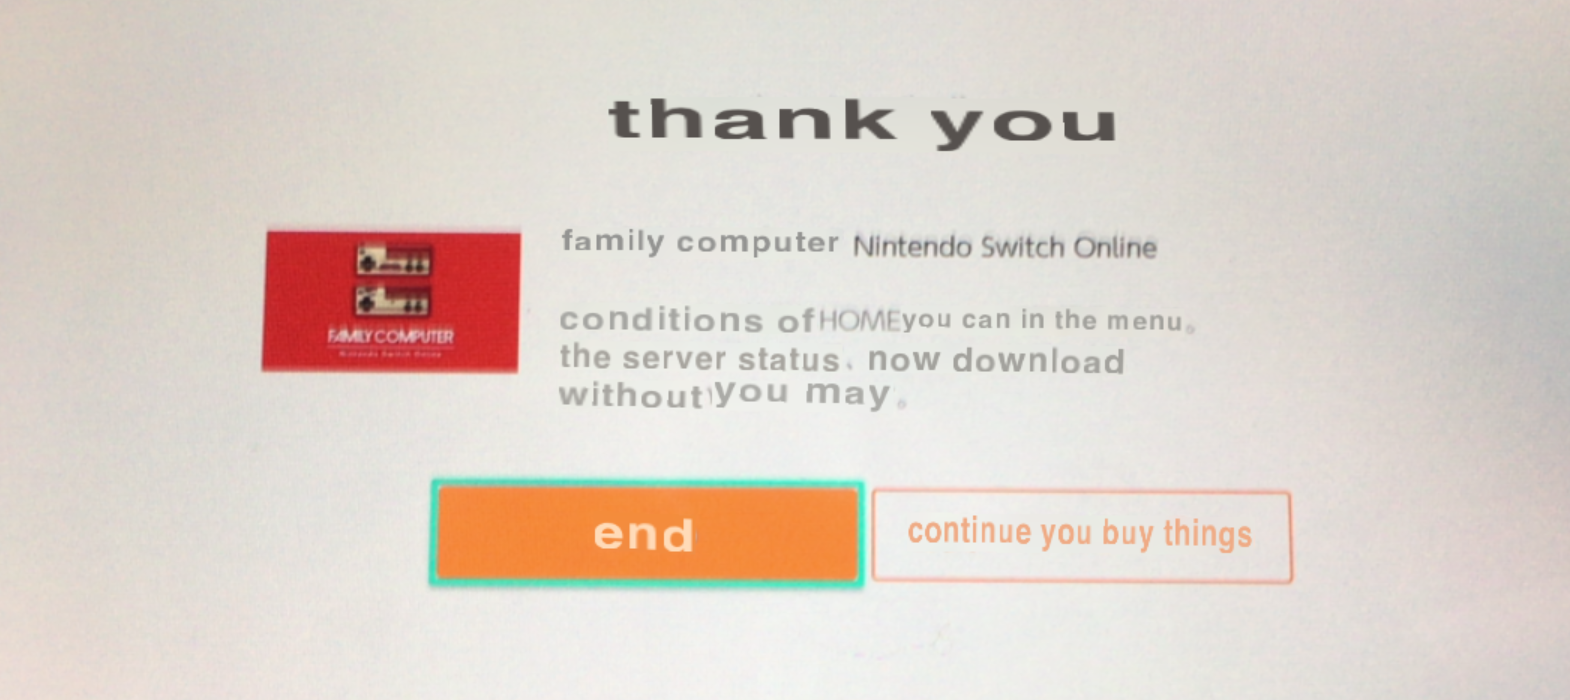
  1. Lastly, you’ll be presented with the order confirmation “thank you” page. Click the left button of the “thank you” page that translates to “ends”. (The other button is to continue shopping in the Japanese eShop.)

Screenshot showing a Google Translate interpretation of the order confirmation dialog with the left-hand button translated as end and the right-hand button translated as continue you buy things.

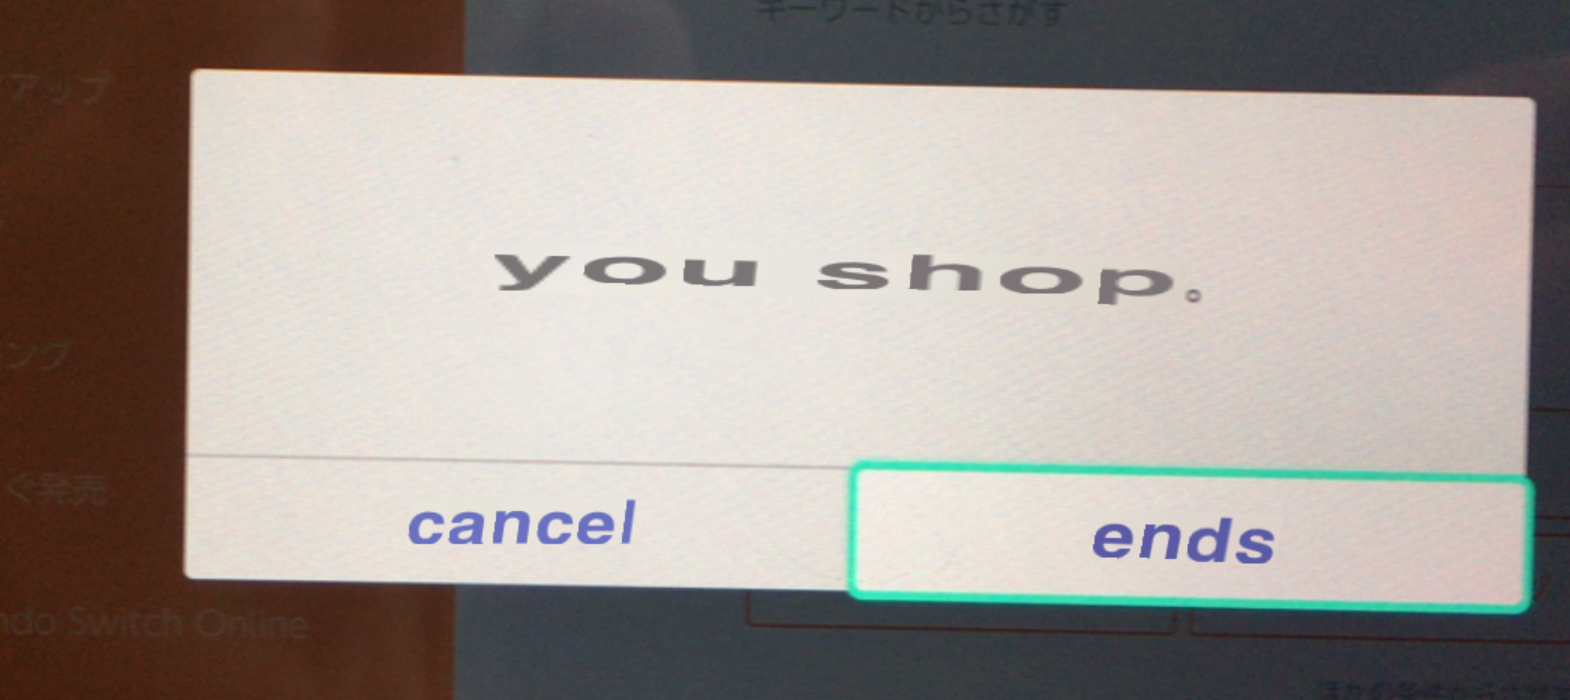
  1. You can hit the Home button to return to the home screen or hit the B button repeatedly to exit out of the eShop. (If you exit out, you’ll need to confirm on a dialog with the right-side button that translates to “ends”.)

Screenshot showing a Google Translate interpretation of the shop exit confirmation dialog with the right-hand button translated as ends.

If you have parental controls set up on your Switch, you might even get notified of the new app install.

Screenshot of an iOS notification from the Nintendo Switch parental controls app saying that the Famicom app has been installed

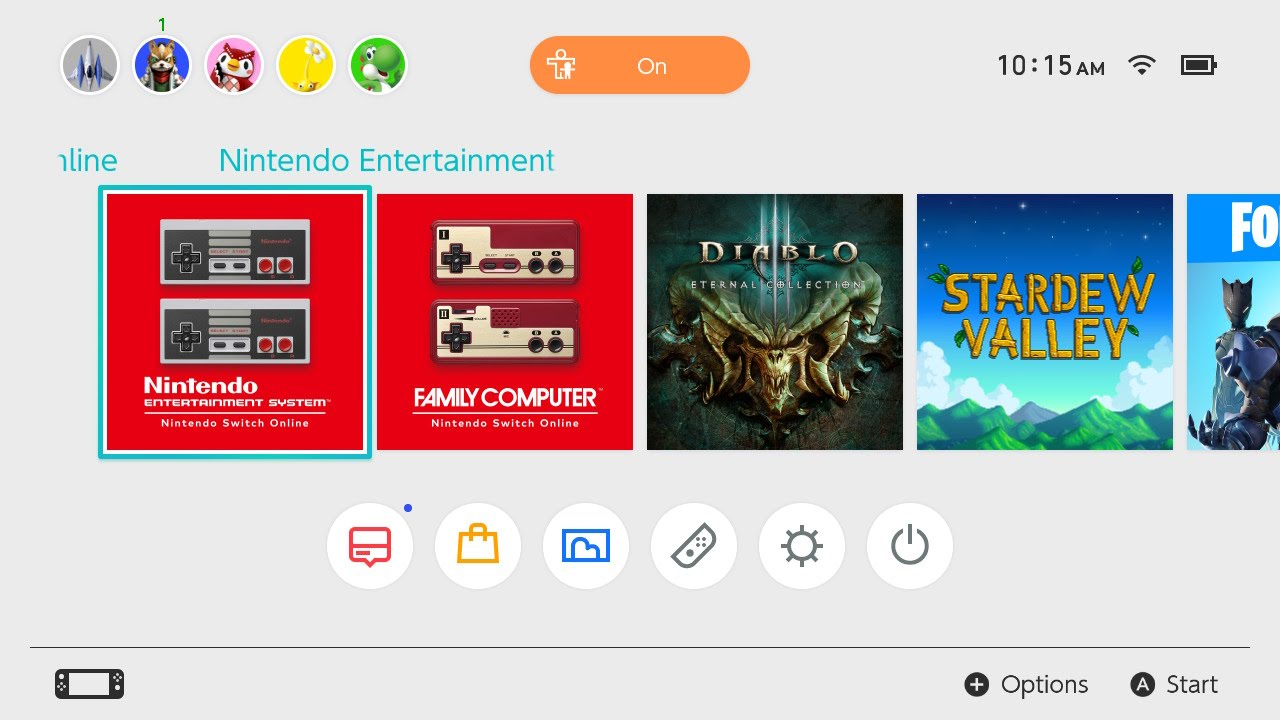
  1. Now, launch the newly-installed Famicom app from the home screen. When asked who is playing, use your normal Switch account.

Screenshot of the Switch home screen showing the Famicom app next to the NES app

It will verify that you have a license to play the game, which you get by having a Switch Online subscription, and let you get to the fun.

This is where you definitely wanted to pick your normal Switch account. If you pick your new Japan-based account, it will likely fail to launch and ask you to subscribe to Nintendo Switch Online.

Launch the Famicom games app

Several of the Famicom games won’t be hard to figure out. In fact, some of them will display different text if run on a system with its language set to English. If you have too much trouble, though, that’s where the Google Translate app can help you out.

Just like the NES app, you press ZL+ZR to bring up the options. The options appear to be identical to the NES app, just displayed in Japanese. The first option returns you to the current game, the second option is Load Suspend Point, then Create Suspend Point, Reset Game, and To Game Selection is the last option.

Switch screenshot assembly of all the Famicom titles in a single image

Fallback variables in `dotnet new` templates

Previously, we created our first custom dotnet new template and added our first input parameter for it. Next, let’s get a little more advanced with our parameters to make our life easier. In this post, we’ll create a template symbol that will function like a coalesce operator, taking a preferred input but falling back to a different input if the preferred value is not found.

This is the third in a collection of posts about creating custom templates for the dotnet new system.

Sample code

This is the third in a series of posts about creating custom templates for the dotnet new system. I’ll be working from the results of the prior blog post, but the approach can be used to add this functionality to any dotnet new template. If you want a starter template project to get you going, you can clone the Git repo from that blog post and start from the prior 2-input-parameters template.

Why a coalesce/fallback symbol?

There are bound to be several great reasons to need a fallback variable, or one that coalesces between multiple potential inputs, but here are a few I’ve run across so far.

Provide a generated value with a manual override

If you remember from the case-changing symbol from the prior post, there are symbols that can be computed in some fashion. In that case, we were adjusting the letter casing of another input to be upper-case, but there are several other type: generated symbol options. If you have a default of generating a template value but want to allow the user to submit an override value, the coalesce generator is perfect.

I’ve used this previously when templating a repo license file to generate the copyright year value but allow for a user-submitted override for existing, older projects. (Yes, that is a NuGet package with dotnet new templates for creating more dotnet new templates.)

Provide a fallback to another user-provided symbol

Alternatively, if you have a template value that might need to be set manually, but should adopt a value from another symbol when the manual value isn’t present. This is also easily accomplished with a generator: coalesce symbol by pointing it to the manual input value for the primary symbol and the back-up input value for the fallback symbol.

On a recent project involving a content management system, pages had several YAML values. One value for content would be the full-length title to display at the top of the content page, but there was also a shortened title available for lengthier titles to display in width-constrained locations. If you didn’t need a special shortened variant of the title, you could omit that value and it would simply use the full-length title for both YAML values.

Create a coalesce symbol

At its core, a coalesce symbol has two parameter values: sourceVariableName and fallbackVariableName. These two values can point to any other symbols you have defined, whether they are other input parameters or generated values or a mix of the two.

   "copyrightYear": {
       "type": "parameter"
   },
   "copyrightYearGenerated": {
       "type": "generated",
       "generator": "now",
       "parameters": {
           "format": "yyyy"
       }
   },
   "copyrightYearReplacer": {
       "type": "generated",
       "generator": "coalesce",
       "parameters": {
         "sourceVariableName": "copyrightYear",
         "fallbackVariableName": "copyrightYearGenerated"
       },
       "replaces": "{copyrightYear}"
   },

In this example from the repo license template example mentioned previously, we have a copyrightYear parameter optionally provided by the person generating content. Then, we have a generated four-digit year symbol (e.g., “2018”). Last, there is a coalesce symbol that points its sourceVariableName to the provided parameter but uses the generated value via the fallbackVariableName when a value isn’t provided. The result of this source-plus-fallback coalesce is then used to replace any instances of {copyrightYear} in the template content.

Check your work

If you got lost along the way or need something to compare to, look in the 3-coalesce-parameters folder of the sample Git repo with the resulting templates from following along with this blog post series.

You can now start introducing coalesce, or fallback, variables into your dotnet new templates. As always, there’s so much more that can allow you to do even more advanced things with your templates, some of which I hope to cover in more posts. If there’s something cool that I need to cover, though, reach out to me on Twitter: @patridgedev.