Add variables to your custom `dotnet new` template

Previously, I covered creating your first custom dotnet new template. Now, let’s work on customizing the content our template generates based on inputs provided via the command line. I’ll be working from the same custom template from that post, which is just a dotnet new console output with its own .template.config setup. If you want a starter template project to get you going, use the template from the 1-custom-template folder from the Git repo from that blog post.

This is the second in a collection of posts about creating custom templates for the dotnet new system.

Your first input parameter

When you are generating content from a template, your first parameter for controlling things is built in to the SDK. There are two variables used to decide where to put the generated content: --output and --name. If you provide a path via --output "some/path", the content will be generated in that location. If, in your template’s template.json file, you set "preferNameDirectory": true, you can set the same path via --name "some/path". (If you have the preferNameDirectory variable set to true and provide both an output and name variable, it will use the output value.) Without either command-line parameter, the new content will be generated in the current directory.

Passing in more useful data for your template requires some additional changes to the template.json configuration.

Taking inputs for generating content

To start consuming inputs to alter your generated content, add a new object to the template configuration JSON in template.json.

{
    "$schema": "https://json.schemastore.org/template",
    ...
    "symbols": {
        "helloMessage": {
            "type": "parameter",
            "replaces": "Hello from a new template!"
        }
    }
}

This sets up your template to take a helloMessage parameter via the command line like this.

dotnet new console-awesome --helloMessage "Hello from a command line override!"

The resulting Program.cs file will have a call using our custom parameter.

Console.WriteLine("Hello from a command line override!");

If we don’t pass in that helloMessage parameter, the substitution is made with the value set in a symbol’s defaultValue field.

When the content is generated, it will process the template files and replace all instances of “Hello from a new template!“ with the provided parameter value. We only have one instance here, but you could have several if your template requires it.

Making the output more predictable

Since the template system does a find-and-replace on our symbols defining a replaces value, I want to make sure it doesn’t accidentally find any other instances I didn’t intend for it to replace. To do that, I will typically use a placeholder string that is always replaced, like a template token.

Most template examples I have looked over seem to put default data in the file to be processed and replace that value with the replaces value. I tend to use a placeholder string and a defaultValue within the symbol instead. They both result in the same generated content, so let your own preferences guide you here. I feel like I’m less likely to have identical text elsewhere that will get accidentally replaced as a “false positive” when I use replacement tokens than with actual content.

In the previous example, I would replace the WriteLine parameter in C# with something like Console.WriteLine(”{helloMessage}”) and configure the symbol like this.

{
    "$schema": "https://json.schemastore.org/template",
    ...
    "symbols": {
        "helloMessage": {
            "type": "parameter",
            "replaces": "{helloMessage}",
            "defaultValue": "Hello from a new template!"
        }
    }
}

You will end up creating a symbol for each input you want to accept from the command line, and several more advanced steps. You will also create symbols for some of the processing you wish to do to other inputs, for example changing the letter casing of a provided value.

Changing input parameter casing

There are lots of things we can do to incoming parameter values, but we’ll start with a simple one: forcing something to all uppercase or lowercase. If you’re taking in an input from a user of your template, you can’t always rely on them providing the expected input. For example, if you expect an ID field in your template to have letters in uppercase only, you will want to set it up to enforce that when the templated content is generated.

We add this string modification as a second symbol that will derive a modified value from the original, keeping the original also available if you need it. To do so, return to your .template.config > template.config file.

In the symbols section of the config file, add a new symbol to capitalize the existing helloMessage symbol; I don’t know if there’s a best practice, but I try to name my modifier symbols after what they do. So, in this case, name your new symbol helloMessageUpper. Let’s see what that will look like.

"symbols": {
   "helloMessage": {
       "description": "",
       "type": "parameter",
       "replaces": "{helloMessage}",
       "defaultValue": "Hello from a new template!"
   },
   "helloMessageUpper": {
       "type": "generated",
       "generator": "casing",
       "parameters": {
         "source": "helloMessage",
         "toLower": false
       },
       "replaces": "{helloMessageUpper}"
   }

}

First, we still have our input symbol, helloMessage. Then, we add our new helloMessageUpper symbol. To tell the system we are making a computed symbol, we set the type of our symbol to generated. We then need to tell it what kind ofgeneratorto use:casing` in this case, to tell the system we are going to modify the casing on some other symbol.

When you use a generator symbol, you often require some additional configuration, which is done with a parameters configuration object. In this case, you provide a source symbol, the input to our casing generator, and the direction to adjust the letter casing in a toLower boolean value.

The toLower boolean value doesn’t have any sort of toUpper equivalent. As you might expect, if you set it to true, it will result in a lowercase symbol you can use. What may not be as obvious, though, is that setting toLower to false will result in an uppercase symbol.

With the generator configured, we simply add a replaces value again to tell it what gets our new uppercase-transformed input in the template output.

To test our output, let’s add another line in the template C# source.

Console.WriteLine("{helloMessage}");
Console.WriteLine("{helloMessageUpper}");

Now, we need to install or modified template and generate content from it. From your template directory, make sure you have the latest installed.

dotnet new --install .

If we generate a project from our modified template without any command-line parameters, we get the default symbol value. That default is also fed into the generated symbol for it’s upper-case equivalent.

This command…

dotnet new console-awesome --output TestRunNoParameter

…results in a TestRunNoParameter/Program.cs containing these calls. (Remember, the output parameter will generate the content in a folder with that name, used here to keep our test output organized.)

Console.WriteLine("Hello from a new template!");
Console.WriteLine("HELLO FROM A NEW TEMPLATE!");

And when we provide our own command-line parameter, it substitutes the provided value as above and also passes that value into the upper-case generator.

This command…

dotnet new console-awesome --helloMessage "Hello from a command line override!" --output "TestRunParameterOverride"

…results in these calls in Program.cs.

Console.WriteLine("Hello from a command line override!");
Console.WriteLine("HELLO FROM A COMMAND LINE OVERRIDE!");

Check your work

You can now start introducing variables into your dotnet new templates. If you want to compare your work to a template created by following along, check out the 2-input-parameters folder of the GitHub repo created for this blog post series.

There’s so much more that can allow you to do even more advanced things with your templates, some of which I hope to cover in more posts. If there’s something cool that I need to cover, though, reach out to me on Twitter: @patridgedev.

Making a custom ‘dotnet new’ template

Why make a template

I am a bit biased these days, but once I spin up a folder structure and/or text document manually more than twice, I give some thought to templating it. If I need to keep making more of something, the time to get all the boilerplate content in place is time taken away from the good stuff I want to write.

This is the first in a series of posts about creating custom templates for the dotnet new system.

How to template

There are lots of templating systems out there that can allow you to create content quickly. If you have used any of the ASP.NET generators, those use Yeoman to spin up new ASP.NET projects quickly. I’m not saying any template engine is better here, just showing what I’ve been using lately.

I have been using the templating engine built into the .NET Core SDK, since it tends to be installed on all my development machines. The .NET Core template system is exposed through the dotnet new command-line program, where the dotnet program is able to do way more stuff like compiling code, managing NuGet packages, or running .NET Core applications. (Run dotnet --help to see a list of all the SDK commands available to you.)

That said, if you need to be able to create content from templates in an environment where you don’t want the full .NET Core SDK installed, you may want to consider other alternatives, or research how to put just a core templating engine into your own tools and deliverables.

Get started with .NET Core SDK

You can get the .NET Core SDK installed on macOS, Windows, and Linux. I have it on my MacBook, a couple Windows 10 machines, and a Raspberry Pi or two. If you work with Visual Studio 2017 or Visual Studio for Mac, you may have it installed already, too. From your favorite command line, run the following command to get the current installed .NET Core SDK version on your machine.

dotnet --version

If that fails for you, you can still join in the fun. Run over to the .NET getting-started guide and click the download link. That link should land you in the right spot for your current platform. After you install the SDK, you may need to close and relaunch any command line windows you had open previously.

Once you have the .NET SDK installed, give that command another run to make sure everything is happy. I am running version 2.1.300, which is the latest release as of writing this. If you got something like 2.1.###, you should be able to do everything I’m doing here (taken with a big Works on My Machine™ disclaimer).

Create a project

The default .NET Core SDK installation will give you some initial templates if you want to give them a shot. To list all the available templates, just run the following command with no parameters.

dotnet new --list

You should have at least some .NET Core templates for console apps, test projects, and ASP.NET projects. Let’s spin up a .NET Core console app. Each of the templates has a “short name” you can pass to dotnet new. If you use a template without any parameters, it will put all the resulting files in your current directory. In this case, this command will create a C# project file named after the current directory and code file (as well as some results in /obj because it also does a NuGet restore).

dotnet new console

Don’t worry, though. If you run this command in a directory where you have conflicting files, it won’t overwrite them. You’ll get an error for any conflicts.

So you don’t have to worry about polluting your current directory, you can give the command another option to drop the template output into a new destination.

dotnet new console --output MyConsoleApp

With the --output parameter and value, the result will be put in the /MyConsoleApp folder.

While many of these templates create projects you can immediately compile and/or run, that certainly isn’t a requirement. In this case, you could run the following commands to execute the resulting console project.

cd MyConsoleApp
dotnet run MyConsoleApp.csproj

I want my own template

Now we can start having fun. Let’s say you need to make your own console template. The only difference between the console project we generated and a template of our own is a .template.config folder containing a template.json file. First, make a change to your MyConsoleApp project to make it your own. A simple-yet-noticeable change would be to edit Program.cs to output your own phrase. In my case, I changed the Console.WriteLine call to this.

Console.WriteLine("Hello from a new template!");

Now, we just need the template configuration.

Create a new folder in MyConsoleApp called .template.config.

Open your favorite text editor and create a new file. Save it to the .template.config folder as template.json. This JSON file is just the configuration for our template. Here is a sample of the bare minimum this file we might use for our console app template.

{
    "$schema": "https://json.schemastore.org/template",
    "author": "Adam Patridge",
    "classifications": [ "Console" ],
    "identity": "PatridgeDev.TemplateBlogging.Console.CSharp",
    "name": "Our slightly modified console app",
    "shortName": "console-awesome"
}

The $schema value is always the same. This just tells compatible IDEs how to offer assistance when creating these documents. For example, Visual Studio Code will use the schema to offer some IntelliSense to us.

The author value is you.

The classifications value is an array of descriptions you might use for your project. Not going to lie, while these are listed when you do dotnet new --list, I have yet to figure out how to query them, or if you even would before you have dozens of templates.

The identity value is just a unique name for our template within the dotnet new list. You can use some sort of reverse-DNS notation as I did or just about anything. (There seems to be a trend to put language in the last portion, but that is likely only needed if you have multiple language versions of a single template.)

The name value is the user-visible name for your template.

Lastly, the shortName value is the name people can use when creating things from templates via command line, in the form of dotnet new {shortName}.

Customize the JSON fields to your liking and save the result. With that file in place, we can load our template into the .NET Core SDK with a single command.

dotnet new --install .

This command will install the current directory (.) as a template. If your command line’s current directory is somewhere other than the template, adjust accordingly.

Once you have your template installed, you should see it show up in the list with dotnet new --list. (It also should have output the list after successfully installing the template.)

Templates                                                       Short Name          Language        Tags
--------------------------------------------------------------------------------------------------------------------------
Console Application                                             console             [C#], F#, VB    Common/Console
…
Our slightly modified console app                               console-awesome                     Console

With our custom template in the list, we can generate a new version of our modified console app now.

dotnet new console-awesome --output ../MyNewAwesomeConsoleApp

This will generate a console app from our template in a sibling folder to our template folder. If you wish to generate the console app elsewhere, adjust the path provided to the --output parameter.

Look for your modified line(s) to verify everything generated as expected.

Technically, we have taken a fairly complex template we know nothing about internally and turned it into a completely static template. That’s progress, right? We’ll work on making our templates customizable another time.

Other installation options

The dotnet new --install command can accept a path to a folder, as we are providing here. It can also accept a path to a local NuGet package (.nupkg) or even a NuGet package ID from nuget.org. For example, I’m working on some templates to help with creating new template and adding files to Git/GitHub repos. This command would install those templates from NuGet directly.

dotnet new --install dotnet_new_template_creator

Once you have a template you want to share with folks, you can wrap it up in a nupkg file and send it to them directly or via publishing it to nuget.org.

[optional] Uninstalling your template

I won’t pretend this new custom template is incredibly useful, so let’s make sure we can clean up our test efforts from the dotnet new options. If you install a template from a folder location, you uninstall it from an absolute path to that folder location using dotnet new --uninstall. For example, if I was working at ~/Projects/, my uninstall command would be the absolute form of that path and look like this, with your username instead of {username}.

dotnet new --uninstall "/Users/{username}/Projects/MyConsoleApp"

If you installed a template from a nupkg or NuGet directly, you pass in the package ID. And, if you are ever unsure how a template was installed, you can get a list of all the valid uninstall parameters with an empty --uninstall command.

dotnet new --uninstall

Check your work

If you got lost along the way or need something to compare to, look in the 1-custom-template folder of the sample Git repo with the resulting templates from following along with this blog post series.

Next steps

That’s the basics to getting started with your own dotnet new templates, but there are so many parts of the templating system that could have their own blog posts. In later posts, I’m hoping to explore some of the more complex features of the template config. If there’s something cool that I need to cover, reach out to me on Twitter: @patridgedev.
Cleaning up unused images in your Markdown content with PowerShell

I was recently tasked with cleaning up some Markdown content with a bunch of screenshots. Sometimes as content was revised, an image would no longer be used, but the image wasn’t deleted. As a result, the images folder would often be packed with files that were no longer used in the final Markdown content.

On a few blocks of content, I would do this manually in VS Code. From the file list (Ctrl+Shift+E), I’d select the file, copy the file name (F2, then Ctrl+C), search all the files for that file name (Ctrl+Shift+F, then Ctrl+V). This was painful to do for more than a few blocks, so I decided to turn to automation, Powershell in this case.

PowerShell is available on Windows and Linux/macOS, so it’s great for wherever I need it. It even seems to properly translate my path separators on different platforms.

Getting the image file names

There are a lot of aliases in PowerShell, they make some verbose commands either shorter and easier to remember, or they duplicate functionality found in the host system. For example, the dir command is available in PowerShell, but it is actually an alias for the Get-ChildItem command. (Please note that PowerShell commands are actually called “cmdlets”, just not here…sorry, not sorry.)

So, to get all the image file names I want to search for, I’ll need a variant of Get-ChildItem. In my case, these images were in a “media” folder.

Get-ChildItem .\media\

This will list out my files, but let’s map the resulting objects into just the filename strings.

Get-ChildItem .\media\ | ForEach { $_.Name }

Now, we “pipe” (|) the resulting Get-ChildItem file objects individually into the ForEach-Object command (or just ForEach as we used), and for each item, noted with $_, we grab the Name property to make sure we have just the filename and not the full file path.

Searching a file for a string

As a quick side-step, let’s figure out how to search a file for a particular string. In PowerShell, there is the Select-String command, which the docs say, “Finds text in strings and files.” It can take a string and return the line containing the given -Pattern parameter. I won’t argue it’s the fastest or most accurate way to do text search in files, as I haven’t done any research on alternatives, but it works well enough for my use case.

Select-String -Pattern "something awesome" -Path .\content\*.md

I’m not stressing this command too much. Select-String can do much more advanced stuff, especially if you need regular expressions.

Combination: Find unused images

With a list of image file names, I can now use another command to filter the list: Where-Object (or just Where). If you are familiar with C#, this is just like the Where function in LINQ. WIth any collection, you pass in a method that returns a boolean object. Anything that would return true on that method will make it into the resulting output.

In this case, for each image file name, I want to see if it doesn’t produce any results when run through Select-String on any of the Markdown files.

Get-ChildItem .\media\ | Where { (Get-ChildItem .\includes\*.md | Select-String $_.Name).Count -eq 0 }

Things start to get a little nested here. We look for the name property of each image file within all the Markdown files (those with the .md extension), and only leave the ones with no matches (.Count -eq 0) to each one of the file names ($_ of the Where method). Any image file name that makes it through was not mentioned in the Markdown content, which in my case, means it is fair game for deletion.

Deleting a file

With one last side-step, let’s figure out how to delete a file. In this situation, any image I have that isn’t referenced is bound for the trash.

Remove-Item -Path .\media\some-image.png

The Remove-Item command will delete the item at the given path. That path can be a pattern or even a collection, which will be handy when I have a list of images I no longer want.

Final combination: Deleting images unused in Markdown

With all the commands and a little bit of piping them together, I can now assemble a command that will find all unused images and delete them immediately. In this case, we take the output of finding unused images, filter to just the fully-qualified path ($_.FullName) and pipe it directly into the Remove-Item command.

Get-ChildItem .\media\ | Where { (Get-ChildItem .\includes\*.md | Select-String $_.Name).Count -eq 0 } | ForEach { $_.FullName } | Remove-Item

And with that, goodbye unused images.

Adding HTTPS to WordPress with Cloudflare

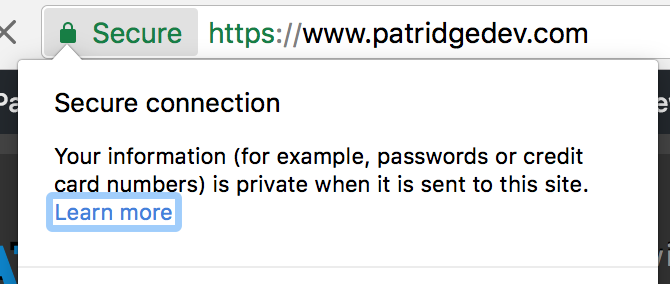
patridgedev.com with a fancy green "Secure" padlock

With some helpful pursuasion from Planet Xamarin, I decided my blog needed to support HTTPS requests. I’ve wanted to find a way to support HTTPS traffic on my blog for a while, but I wanted to find a solution that would Just Work™ without me doing the leg work. I’ll stick to writing the blog posts and let someone else worry about hosting details.

Just like anything security-related, setting up SSL intimidates me a bit (more so because this often involves the dark magic of DNS records). I’ll do security when I have to, but my prerequisite is always that I read so much about the topic I feel comfortable explaining every decision I make to either an expert or someone completely unfamiliar with the topic.

Encrypting patridgedev.com traffic

This blog is currently a WordPress site on a host using AdminPanel. I have spent hours in IIS for ASP.NET sites, but almost nothing on Linux hosting. It’s all just me poking around hoping to find things. Fortunately, when it comes to SSL support, there are simple options that can bolt on to other hosting: specifically Let’s Encrypt certificates and Cloudflare’s secure proxy system.

Everything I looked into for Let’s Encrypt said to use the settings in AdminPanel, but that required some administrator management to enable. These are not my servers, so that was a no-go.

Cloudflare is a proxy between the world and my site that just happens to offer some mostly-automated, and free, SSL support. You give it a domain, it scans the DNS for that domain and creates a new DNS layer, with some requests going through their system before your servers see them. With those DNS records in Cloudflare’s system, you simply update your nameservers at your domain registrar, Namecheap for most of my domains. (Disclaimer: if you buy Namecheap services through that link, they’ll give me little bit as an affiliate.)

In doing this proxy dance through Cloudflare’s DNS, they can encrypt the connection between any web visitor and the Cloudflare servers. These servers then make requests to my existing servers and return the result through that encrypted connection, making patridgedev.com “support” HTTPS requests. You could argue that the connection isn’t yet encrypted end-to-end, which is true, but it’s way better than before where the connection could be compromised at any point from your computer to my servers.

There was zero downtime with this transition. My old DNS entries went away, and the new Cloudflare ones took over. Unfortunately, it also didn’t magically make my site SSL-awesome.

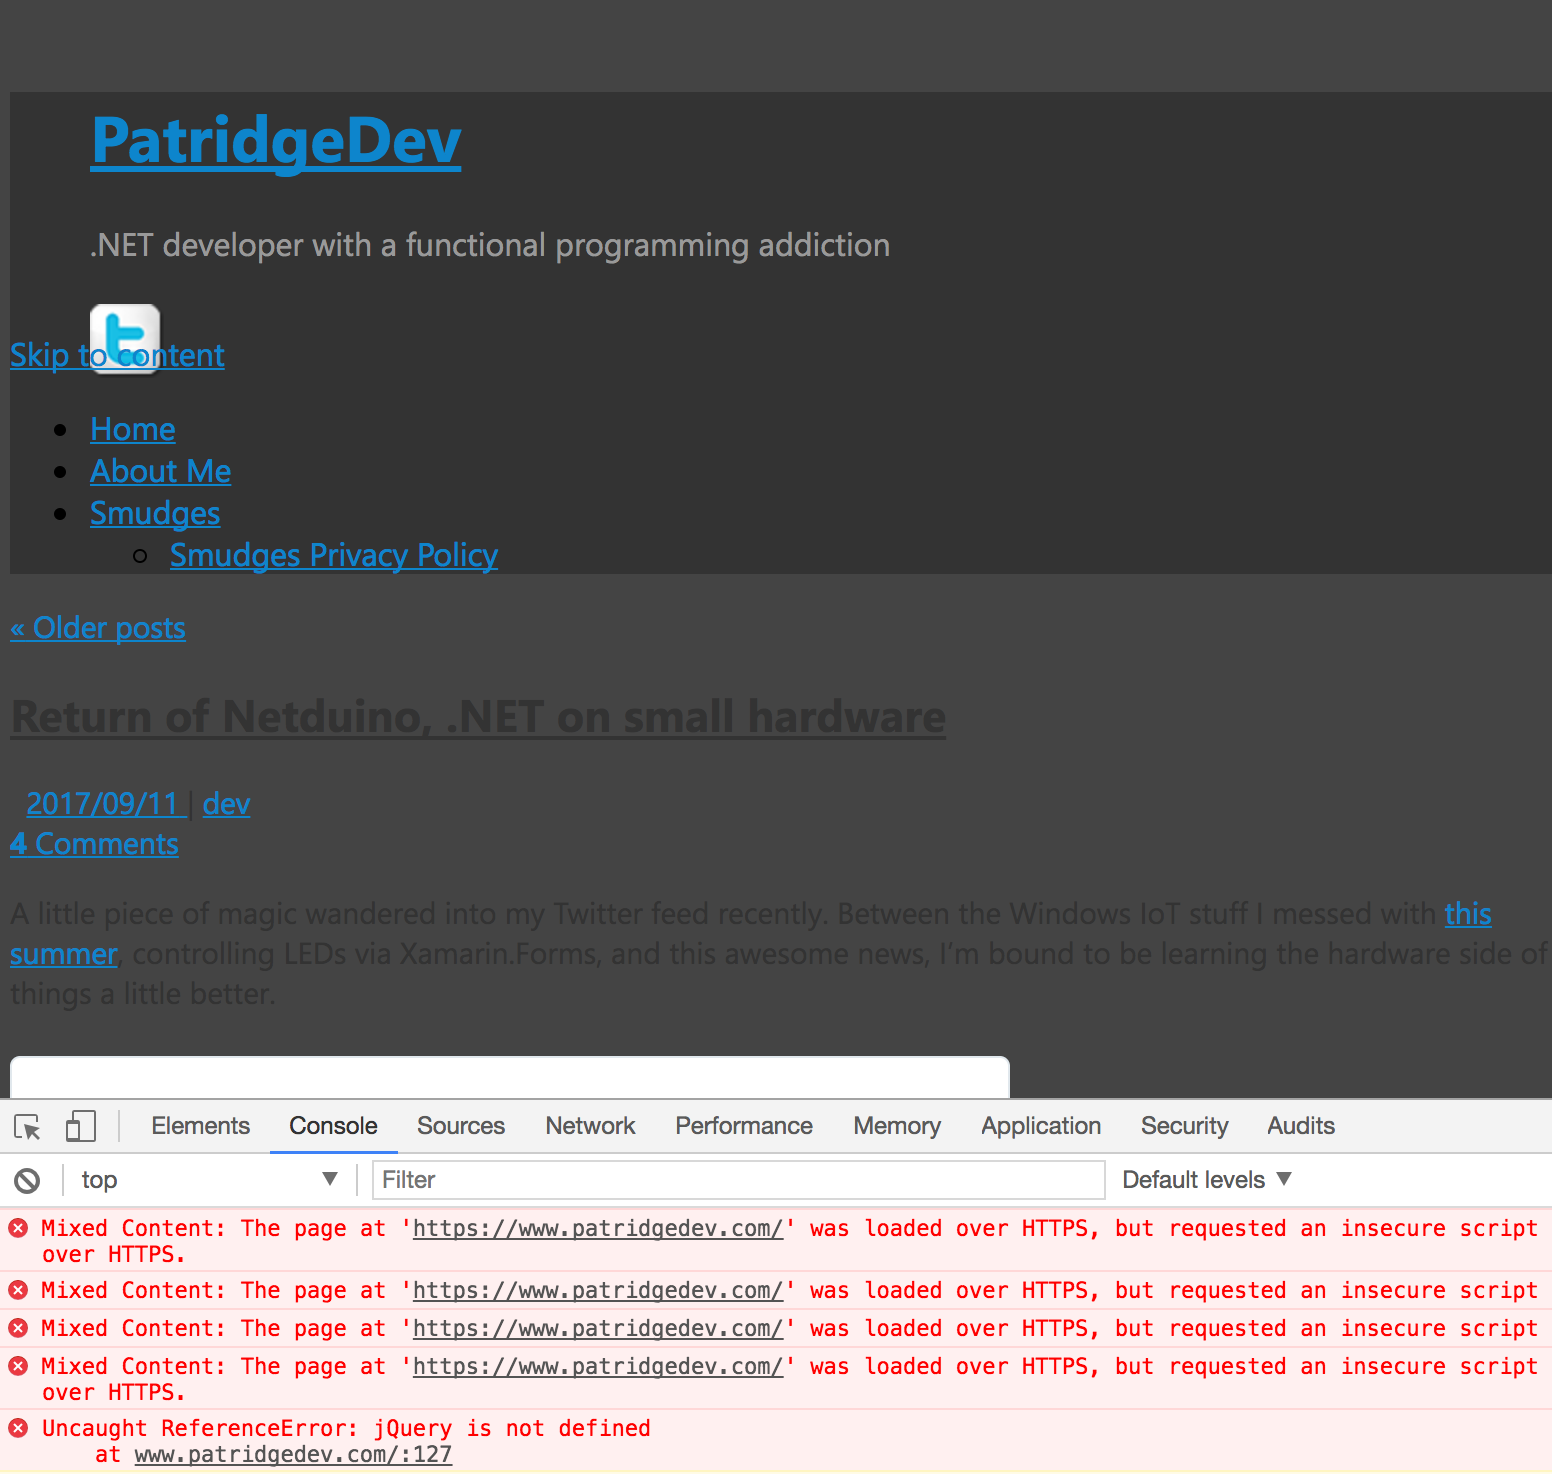
patridgedev.com with several mixed-security broken things making it render horribly in most browsers

Making WordPress SSL-awesome

You probably don’t want to stop here, as most browsers will block mixed content like this. If a malicious attacker can intercept your HTTP requests for the JavaScript on an HTTPS web site, they can do all sorts of nasty things (stealing authentication cookies, making requests on your [authenticated] behalf, changing content in subtle ways). You really do want the browser to prevent that for important sites, even if it means things break. For patridgedev.com, I just don’t want anyone to have such a bad experience on HTTPS, so I had to fix it.

Most of these issues were because links were still being fully qualified to https:// inside WordPress. The simple solution to this was supposed to be setting the WordPress Address and Site Address to https://www.patridgedev.com under Settings>General, but that didn’t seem to do anything for the site. In fact, it made it so my admin WordPress pages would get stuck in a redirect loop.

Setting the WordPress and Site Address fields to HTTPS

Investigating with Chrome Developer Tools showed a request being made over HTTPS and an immediate redirect to the exact same HTTPS URL, meaning it wasn’t redirecting back and forth between two places as I first suspected. I didn’t have anything custom in an .htaccess file, so it wasn’t causing the redirects. The DNS settings didn’t have anything funky that would cause this, just normal A records for www and non-www. I even searched my site’s code for instances of http:, but that was a really noisy set of search results.

My searches for “WordPress too many redirects” were finding lots of potential suspects, but none seemed to apply to my site. Once I added “Cloudflare” into the search term, I stumbled on this Stack Overflow question where the original source appeared to have been having an .htaccess issue. The question had one sad no-votes (at the time) answer that turned out to be my magic bullet.

Inside WordPress is an is_ssl method that checks a couple $_SERVER variables to decide if the current request is using HTTPS and/or port 443, neither of which is technically true for HTTPS requests at that point. WordPress was not seeing HTTPS requests, because they really aren’t. The connection to Cloudflare is secure, but my site is seeing Cloudflare’s proxied requests via old-school port-80 HTTP.

This is_ssl method gets called all over the place to decide how to prefix fully-qualified URLs with a protocol. In order to get through that logic, we have to force the $_SERVER['HTTPS'] variable to be true at the right time before that method is ever called. That’s exactly what the Stack Overflow answer establishes. We set up a little extra check in the site’s root wp-config.php file for a particular header seen on Cloudfare’s proxied requests hitting my site.

php if (isset($_SERVER['HTTP_X_FORWARDED_PROTO']) && $_SERVER['HTTP_X_FORWARDED_PROTO'] == 'https') { $_SERVER['HTTPS'] = 'on'; }

With that in place, we force the HTTPS variable to be 'on' for these requests whenever is_ssl is later called for URL generation, resulting in much happiness. There were still a few non-SSL requests on my blog pages, most of which was my own doing.

Cleaning up the last errors

I had a few widget HTML blocks that were referring to HTTP content: an ancient Amazon affiliate script include, an old Stack Overflow profile badge image, an Apple App Store widget for Smudges, and a lot of embedded post images (and post cross-links). All said, it was just a visual find-and-replace job in WordPress. Only the Apple widget wasn’t as simple as adding an “s” to a URL.

Apple add widget snapshot after HTTPS efforts

The App Store widget definitely doesn’t cooperate with a HTTPS page. Presumably, it is mishandling things on a secure connection. It’s especially evil since it seems to render fine, so the non-SSL request is totally unnecessary. Unfortunately, even the latest iframe HTML from Apple hasn’t changed, so the error won’t go away.

It turns out that I had a tendency to be inconsistent when embedding images in my posts. While there are probably ways to do mass find-and-replace efforts in WordPress, I just opened all my posts individually and did the work there. It wasn’t as bad as it sounds; only a handful of posts had the domain hard-coded, and I haven’t written enough posts to feel intimidated by the count.

I probably still need to set up a forced redirect for non-SSL requests to be secure by default. This could also make sure search engines don’t see HTTP and HTTPS pages as different content, but I’ll work toward that another time, maybe when I finally get to rewriting this blog as a static-content site (e.g., Jekyll and GitHub Pages).

I’m hoping none of this will affect anyone reading blog posts here, but if you see anything looking unusual, drop me a line on Twitter.

Return of Netduino, .NET on small hardware

A little piece of magic wandered into my Twitter feed recently. Between the Windows IoT stuff I messed with this summer, controlling LEDs via Xamarin.Forms, and this awesome news, I’m bound to be learning the hardware side of things a little better.

That’s right, Netduino has returned; this time Wilderness Labs has taken the reins (with Bryan Costanich heading things up). Netduino is a hardware platform, similar to Arduino with lots of input and output options through a bunch of pins on the board, that allows interacting with it using .NET. Not only has Wilderness Labs resurrected Netduino, they have released three new boards: Netduino 3, Netduino 3 Ethernet, and Netduino 3 WiFi.

According to the Wilderness Labs Netduino docs, these new boards are as fast as ever, all running Cortex-M4 processors at 168MHz, and with more flash storage and a bump in RAM: the base Netduino 3 has 384KB of flash (matching the old Netduino 2 Plus), and the Netduino 3 Ethernet and Netduino 3 WiFi both have a bump to 1,408KB. If it wasn’t obvious, the Netduino 3 Ethernet board also offers a 10/100 Ethernet port, and the Netduino 3 WiFi has an 802.11b/g/n wi-fi adapter. So, they are as fast as ever and with more resources to do what you tell them.

I have been interested in Netduino since I first heard about it, though I didn’t buy one to play with until the release of the prior Netduino 2 Plus. All I had ever done with that system was blink the on-board LED. A few hours after I read that tweet, I was digging through my box-o’-electronics until I found it. This time, I decided I would do something more useful, or at least more fun.

Getting hardware rolling [again]

Since I wasn’t entirely sure what firmware was installed on my Netduino, I decided to install the latest from Wilderness Labs. I figured there was no sense in finding a bug that was fixed in the later firmware versions.

Unfortunately, every time I tried to flash the firmware on my MacBook, it would get stuck. After several unsuccessful attempts to debug the issue, I randomly ended up using a different USB cable. Everything flashed perfectly after that, and I tossed the defective USB cable. While it may not help with my faulty cable issue, Alex Corrado has since updated the error handling on the macOS firmware update tool, so you may have not have as much trouble debugging issues by the time you read this.

Getting an IDE rolling

What little code I wrote the last time I did Netduino development was probably on Visual Studio 2013. While the Netduino Discord channel looks like Netduino is quickly moving to Visual Studio 2017 and Visual Studio for Mac, it’s not quite 100 percent there yet. So, I busted out my older MacBook with Xamarin Studio. (I could have also installed Visual Studio 2015, but having spent so much time with 2017’s more self-contained installs makes me not want to return to the previous era.)

Since I was going the Xamarin Studio route, I added the Micro Framework add-in/extension as instructed. A quick restart of the IDE, and I was up and rolling, blinking the same LED I’d blinked a few years back.

What’s next?

I have played with a few sensors and LEDs already, and some more code-happy posts will be coming soon.

So far, I have a few random toys to play with: a water-resistant temperature sensor, a BME280 temperature/pressure/altitude sensor, and an ultrasonic range sensor

Even if the Netduino is overkill, I might start working on a small temperature-monitoring system feeding to Azure IoT Hub with an app front-end for our chicken coop. Or maybe a silly well-sensored aquaponics system. As much fun as blinking LEDs can be, what other semi-useful things should I be trying to make? Drop me a line on Twitter if you have any suggestions.